Table of Contents (click to expand)
Locks work by using a series of pins of varying lengths that are pushed down by a spring. When the correct key is inserted, the pins line up with the groove in the lock and the lock can be opened.
Since the dawn of humanity, we have had possessions that needed to be kept safe. From the clubs of cavemen hidden under rocks to the nuclear launch codes protected by virtual encryption, certain things just need to be kept safe! The concept of using locks as safeguards first arose in ancient Assyria, and these were completely handmade and made of strong alloys. With the onset of the Industrial Revolution in the late 18th century, locks became much more sophisticated and complex.
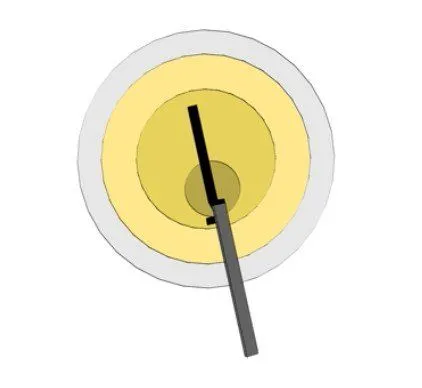
When the correct key is inserted (as in Figure 2), the grooves of the key perfectly adjust the height of the pins. The groove that separates the red from the blue parts of the pin correctly lines up with the edge of the tumbler. If the key is turned in this situation, the whole tumbler rotates and the lock opens.
Step 2:
Determine the direction in which the lock is supposed to rotate. You can do this by using the tension wrench. Insert its smaller end into the edge of the slit, exactly where you would insert the key. Turn the wrench to get a feel for which direction is easier to turn. That’s the direction in which the lock is supposed to rotate. Turn the lock’s cylinder in the correct direction and hold it that way.
Step 3:
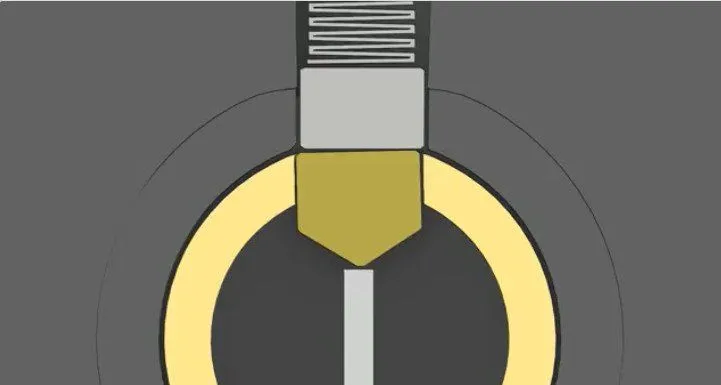
Insert the pick into the upper part of the keyhole and feel the pins. You should be able to feel the force by which the pins are being pushed back down by the spring when you try to push them up. Identify which one is the most difficult to push up. If there is no observable difference in their stiffness, turn the wrench to give the pins even less room to move. You should then be able to identify the hardest pin.

Step 4:
Keep pushing the identified pin up until you hear a faint ‘click’. This means that that it has set with the groove in the cylinder. The upper part of the pin is completely out of the cylinder and is now compressing the spring. The most important part here is keep the torque wrench in place with the two halves of the pin separate; if you loosen your grip, the upper pin will fall back down under the spring’s force.
Step 5:
Work your way around the remaining pins using the same strategy. You might need to adjust the torque on your wrench after each pin ‘sets’ into the groove of the lock’s cylinder. Once all the pins are set, you should be able to turn the cylinder and open the lock!
Although, pin-and-tumbler locks aren’t the only locks out there, they have been in use for ages and it seems like they’re going to stay that way. The security level of such a lock depends on various factors, such as the number of pins, the width of the slit and the accuracy of the design. Sometimes, keys are indented on the plain surface to make it even more difficult for instruments to mimic the behavior of actual keys. However, for most locks, once you master this technique, lost keys won’t be a problem for you anymore.